
Granite Countertops with White Cabinets: A Buyer's Guide

You've chosen white cabinet shutters, and the granite sample looked right in the showroom. At home, though, the doors look slightly blue beside it, the stone looks creamier than expected, and you're wondering what a turmeric spill will do to that pale surface. These are the checks to make before anyone cuts the slab.
Choosing granite countertops with white cabinets takes more than finding a light-coloured stone. You need the right undertone, a finish you'll be able to maintain, and a layout that suits the person cooking. A beautiful slab won't compensate for an uncomfortable counter or a poorly supported sink cut-out.
Table of Contents
- Matching Granite Colours to Your White Cabinet Undertone
- Choosing a Finish and Edge Profile That Holds Up
- Granite or Quartz for a High-Use White Kitchen
- Counter Height and Seam Placement for Your Layout
- Absorption Testing, Sealing and Stain Response
- Test Three Slabs Against Your Cabinets Before You Buy
Matching Granite Colours to Your White Cabinet Undertone
Choose granite by the undertone of the cabinet, not by the word white. Cool white shutters usually work with grey, blue-grey or silver-flecked granite. Warm white and ivory doors sit more comfortably beside cream, beige or gold movement.
The distinction matters because each surface changes how you perceive the other. A warm slab beside a blue-white door can look unexpectedly yellow. Put that same slab beside an ivory shutter, and the combination can feel deliberate.
Granite pairings by cabinet undertone
| Cabinet undertone | Granite to choose | Granite to avoid | Hardware and backsplash |
|---|---|---|---|
| Cool white, bright with a blue-grey tint | Grey, silver or blue-grey flecked, fine-grained | Heavy gold, cream or rust movement | Brushed nickel or chrome hardware; leathered grey backsplash |
| Warm white or off-white, cream or ivory | Cream, beige or gold movement with soft veining | Stark cool grey with bright white speckle | Brass or matte black hardware; wood or honed stone accent |
| Pure bright white, paint-like | Low-contrast grey with subtle speckle | Busy multicolour slabs that fight the doors | Leathered backsplash to break the flat look |
| Contrast-led design, white doors with strong stone | Patterned, veined slab with clear dark minerals | Pale slab with little movement that disappears | Matte black hardware; under-cabinet lighting |
Use this visual guide to narrow the colour family before inspecting full slabs.
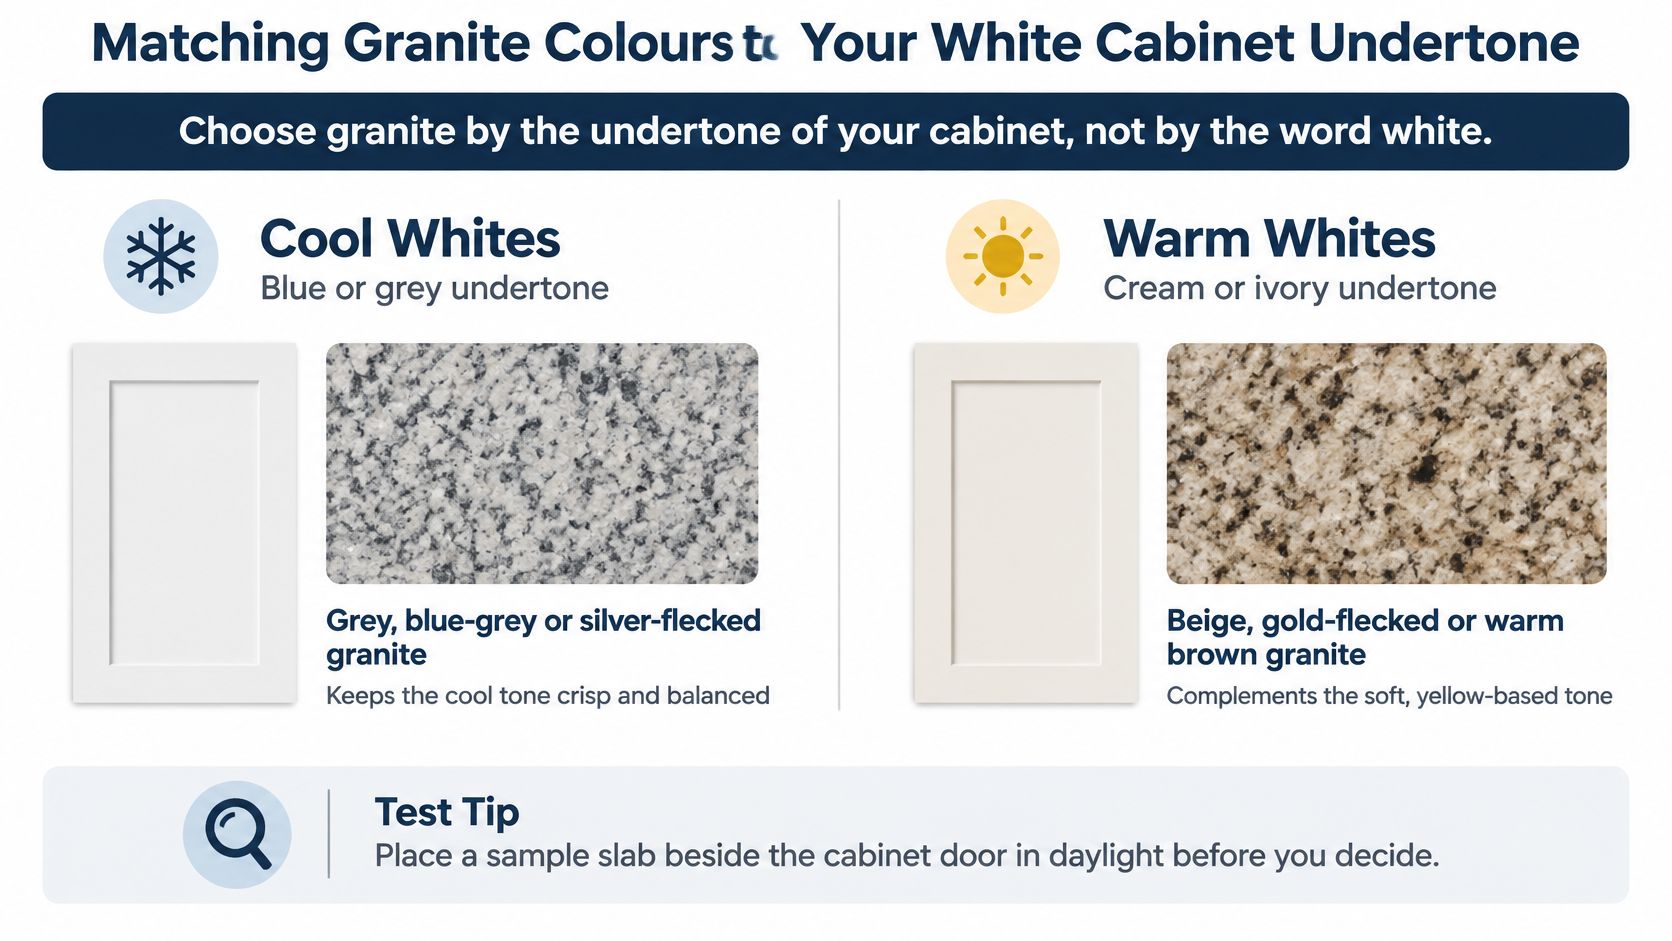
Give white-on-white some definition
A pale worktop doesn't have to disappear against white doors. Add contrast through texture, mineral movement or hardware, rather than relying on countertop accessories. A honed backsplash, a wood shelf or darker handles can separate the surfaces without making the room busy.
If the slab has strong veining, keep the backsplash quieter. Competing patterns are harder to judge from small samples, especially where the worktop turns a corner.
India offers a broad domestic selection. The Indian Bureau of Mines granite review identifies production across Rajasthan, Telangana, Andhra Pradesh, Karnataka, Tamil Nadu and Gujarat. Ask to see different colour families rather than assuming an imported slab is necessary.
Practical rule: Approve the actual slab, not just the trade name. Natural movement can change substantially within the same named variety.
Before buying, place generous samples from your shortlisted slabs horizontally beside an actual cabinet door held vertically. Compare them under warm LED lighting in the evening and daylight in the morning. Include the backsplash sample, because an existing cream tile can rule out a combination that otherwise looks convincing.
Choosing a Finish and Edge Profile That Holds Up
Finish options under white cabinets
| Finish | Look with white cabinets | Marks and fingerprints | Upkeep |
|---|---|---|---|
| Polished | Glossy, crisp contrast; reflects light | Can show water spots and oil film clearly on pale stone | Wipe spills promptly; maintain the specified seal |
| Honed | Soft matte, calm and understated | Less glare can make smudges less conspicuous | Oil can darken inadequately protected stone; verify sealing |
| Leathered | Textured; adds depth beside flat white | Can disguise fine scratches and dust; grime can lodge in texture | Use a soft brush and mild cleaner; follow the resealing schedule |
Polished isn't automatically easier, and matte isn't automatically maintenance-free. Examine each finish under a light held across the surface. That low-angle view reveals greasy patches, polishing differences and texture that overhead showroom lighting can hide.
Leathered granite can be useful in a busy family kitchen, but check the depth of its texture. If you knead dough or prepare oily masala directly on the counter, pronounced recesses mean more brushing. The guide to stone surface finishes helps distinguish the treatments before you request physical samples.
Match the edge to the door and the workload
An eased edge with a small radius suits flat-panel shutters and removes the vulnerable sharp arris. It won't prevent every chip, but minor damage is generally less conspicuous than on a crisp square edge.
Bevel and bullnose profiles give the front edge more definition and can suit shaker or raised-panel doors. An ogee works with traditional mouldings, although its curves need more careful wiping than a simple eased profile.
- Inspect exposed corners: Avoid knife-sharp corners where pans, utensils or people are likely to strike them.
- Approve a finished sample: A profile drawing doesn't show how the stone's minerals will look across the shaped edge.
- Keep the sheen consistent: Ask for the same finish across the perimeter worktop and island, including visible returns.
Don't choose the edge solely from a catalogue photograph. Run your hand along a sample and check how comfortably you can lean against it while preparing food.
Granite or Quartz for a High-Use White Kitchen
Neither material wins outright. Cooking intensity, sunlight, ventilation, budget and willingness to maintain the surface should decide the choice. Granite offers natural variation; engineered quartz offers more predictable patterning and avoids routine sealing.
Compare samples in the setting where they'll be used, not just against a showroom wall.
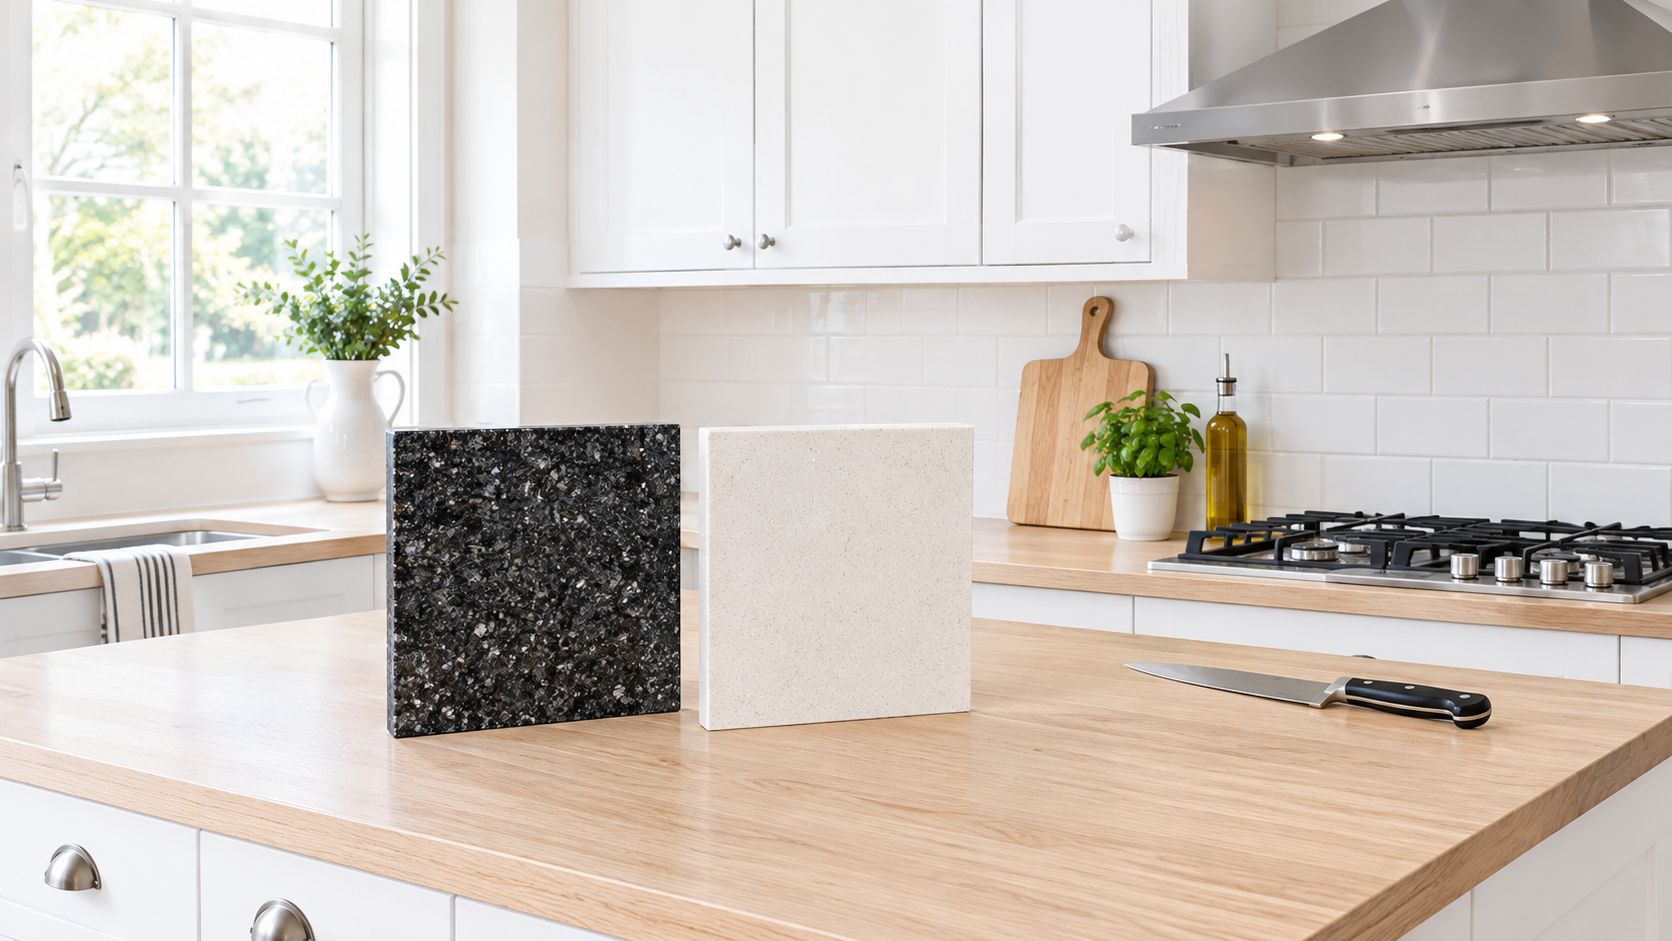
The Scaleinch Indian kitchen guide describes granite as a durable, more affordable alternative to increasingly common quartz worktops. Compare installed quotations, though: a dramatic granite slab with difficult cutting can cost differently from a straightforward quartz installation.
Granite and quartz on the criteria that matter in a white kitchen
| Criterion | Granite | Engineered quartz |
|---|---|---|
| Routine sealing | Set a written interval based on absorption and use | Not needed for routine care |
| Stain visibility on pale tones | Oil and turmeric can leave conspicuous marks if left overnight | Consistent surface; spills still need prompt wiping |
| Heat from hot pans | Generally tolerates heat well, but use trivets to protect repairs and joints | Use trivets; resin is sensitive to high heat |
| Repairability | A fabricator can assess chips and fissures for repair | Repairs can be difficult to blend into a uniform pattern |
| Pattern consistency | Natural variation; each slab differs | More uniform patterning across slabs |
| Five-year upkeep | Budget for cleaning, seal checks and resealing when needed | Mostly routine cleaning and checks of joints and sealant |
Compare the installed system
Neither slab should bridge an unsupported sink cut-out or overhang just because the material feels hard. Ask the fabricator to mark supports and proposed seams on the cutting drawing, then assess whether the selected pattern will align across those joints.
For a broader material-selection checklist, Interiors by DeX's resource on choosing kitchen platform stone in Chennai provides another useful planning reference. The overview of quartz slabs for modern kitchens can help frame the engineered-stone option.
Use the video as a visual companion, then return to the specifications for your selected slab.
Patterned granite can offer good value when you want natural movement and will maintain it. Quartz may suit a heavily used kitchen where resealing would be neglected, provided everyone uses heat protection. Don't pay for low-maintenance material and then expect it to tolerate careless handling.
Counter Height and Seam Placement for Your Layout
A seam placed to save stone is usually the one that cracks. Map the refrigerator, sink and hob first. The INFLIBNET kitchen ergonomics guidance recommends a work-triangle perimeter of approximately 4–8 m, with each leg ideally about 1.2–2.7 m. Keep tall cabinets and major traffic routes out of those working paths.
Treat those measurements as planning checks, not a reason to force an awkward triangle into a compact parallel kitchen. A cook moving between washing, preparation and a hob running hot tadka still needs a clear route, without another person repeatedly crossing it.
Trial the height before fabrication
A standard cabinet carcass doesn't establish your ideal working height. The finished level includes the cabinet, supports and stone build-up. Measure the person who cooks most often, then build a stable mock-up and try chopping, stirring and rolling dough.
Watch the posture rather than asking whether the height feels acceptable. Raised shoulders suggest the surface is too high; prolonged bending suggests it is too low. Where users differ substantially, a separate task surface works better than a compromise nobody finds comfortable.
For context when discussing nominal dimensions with a contractor, the SitePro Bathrooms guide to benchtop heights is a supplementary reference. Your own task trial should determine the final specification.
Don't authorise cutting while the cabinet installer is still adjusting levels.
Use this installation order:
- Measure the users and locate appliances. Include the actual hob and sink models, not approximate catalogue outlines.
- Build the height mock-up and test everyday tasks.
- Reserve landing areas beside the hob and sink so hot vessels and washed ingredients have somewhere safe to go.
- Template only after the cabinets are level and appliance dimensions are verified.
- Dry-lay the pieces to approve vein direction, joints and exposed edges before installation.
Check the granite slab measurement guide when preparing the cutting discussion. Mark seam positions on the drawing, keeping them away from the sink, hob and principal preparation area wherever feasible.
For an L-shaped kitchen with a corner sink, don't accept a seam through a narrow, vulnerable strip merely to save material. Have the fabricator establish a continuously supported joint away from the cut-out and verify overhang support before templating.
Absorption Testing, Sealing and Stain Response
Water-absorption bands and what to do
The Grab My Stone absorption explainer identifies below 0.40% as excellent for kitchen worktops and 0.40–0.60% as serviceable when correctly sealed; a result above that upper band warrants further assessment rather than an assumption of suitability.
| Absorption result | What it means | Action |
|---|---|---|
| Below the excellent-band limit | A favourable starting point for a kitchen worktop | Proceed with the specified sealing treatment and a written interval |
| Within the serviceable band | Suitable only with appropriate protection and maintenance | Seal after fabrication and drying; assess whether closer reseal checks are needed |
| Above the stated serviceable band | Outside the favourable ranges described by the explainer | Request another test or consider another slab |
These bands are selection guidance, not a guarantee against stains. A low result doesn't excuse poor fabrication, and a sealer doesn't turn absorbent stone into an impervious surface.
The process is easier to manage when testing, sealing and spill response are agreed together.
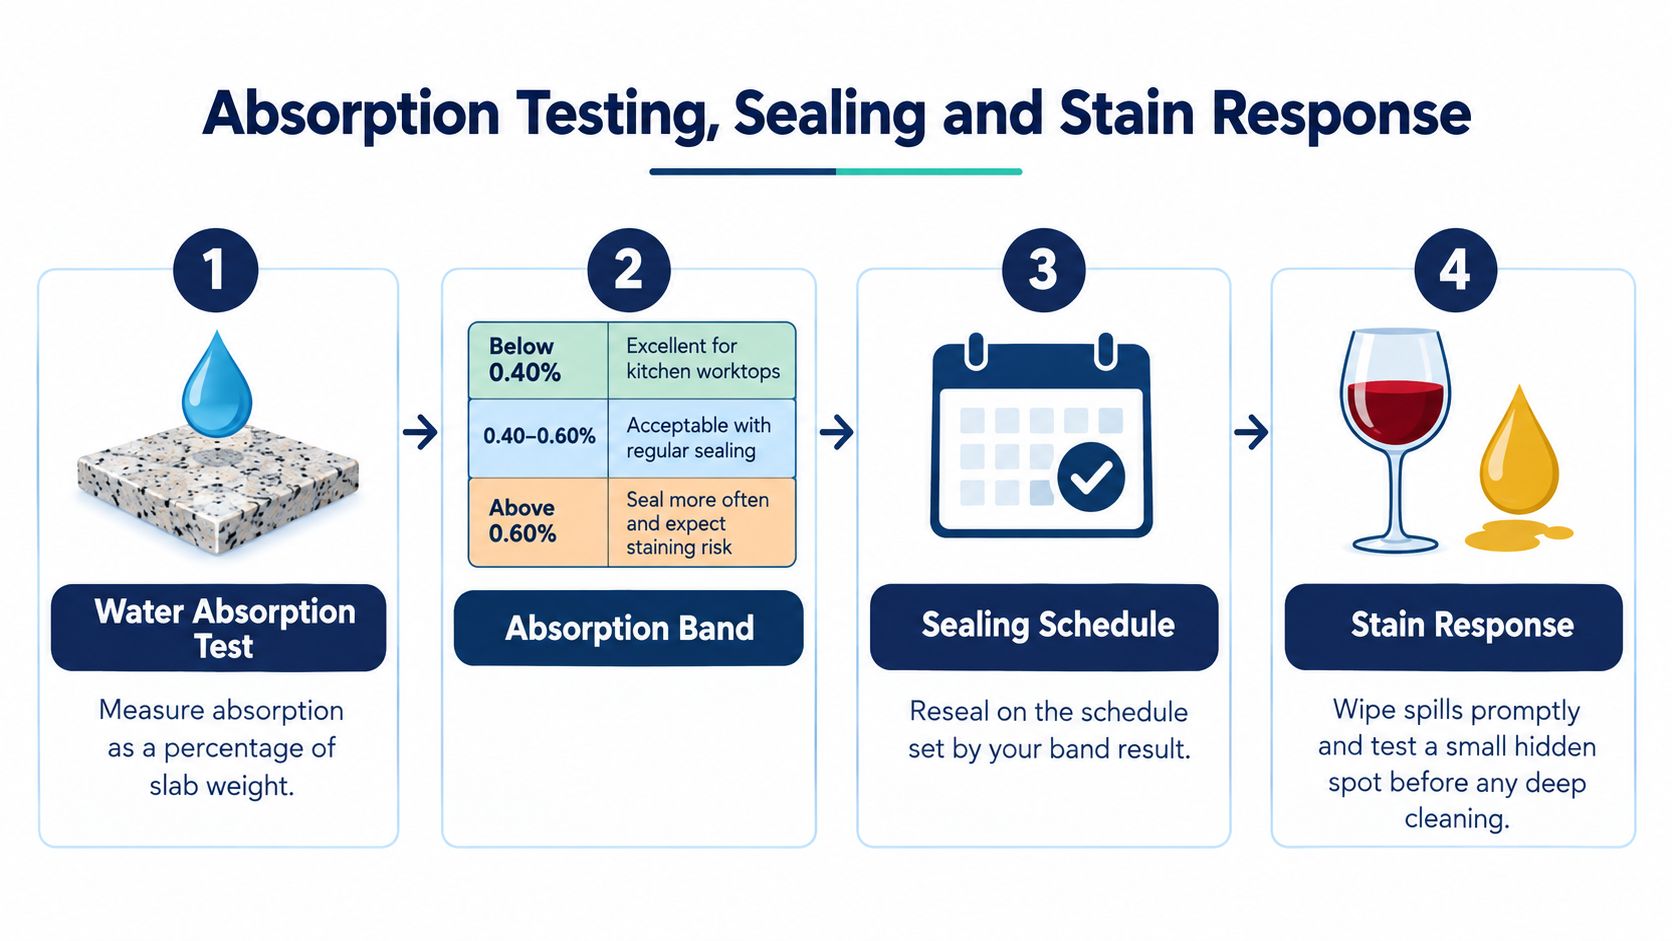
Ask for evidence before accepting the slab
- Record the slab lot and test result. Request a water-absorption report using IS 1124 or a comparable ASTM C97 method, and confirm which material it represents. A generic brochure for a similarly named granite isn't the same evidence.
- Inspect edges, fissures, resin repairs and colour variation under neutral and warm lighting. Ask which features are natural and which have been filled, especially around planned cut-outs.
- Seal after fabrication and complete drying. Use a penetrating sealer compatible with the stone and existing resin treatment. Follow its stated dwell, excess-removal and curing instructions; dried sealer residue can leave a cloudy surface.
- Test water and cooking oil on an offcut or concealed area after curing. Wipe clean and examine for darkening, residue or a change in sheen.
- Obtain a written maintenance schedule. It should identify the product, cleaning method and signs that trigger reassessment, rather than prescribing an automatic annual application regardless of performance.
A few drops of water can provide a useful household check. If the stone darkens beneath them after standing briefly, dry the area and ask whether the protective treatment needs renewal. Darkening indicates absorption, but doesn't by itself establish that the original sealer has failed.
Respond to Indian cooking stains without making them worse
Wipe haldi, oil and curry spills during the same cooking session rather than leaving them until morning. Blot first, then clean with a pH-neutral stone cleaner and a soft cloth. Don't spread an oily spill across a larger area with a saturated sponge.
For an established turmeric mark, ask the supplier for a stone-compatible poultice and test it discreetly. Avoid improvised acidic cleaners or abrasive scrubbing, which can alter the finish without removing the absorbed stain.
Keep trivets beside the hob, particularly where a hot vessel might land across a seam or resin repair. Approve a cured sample of the colour-matched seam filler, too: dark filler can draw attention across an otherwise pale worktop.
Handover check: Leave with the slab identification, care product names, sealing instructions and a contact for stain or repair assessment.
Nobody should promise a universal sealing success rate without a documented product test. The stone, finish, treatment and household habits all matter.
Test Three Slabs Against Your Cabinets Before You Buy
Shortlisting is useful only if you compare the candidates under the same conditions. Don't choose one slab in morning daylight and another beneath warm showroom lights, then trust your memory to judge the difference.
Your showroom checklist
- Shortlist three actual slabs whose movement suits the cabinet undertone. Ask to view the complete face, including the areas proposed for the longest visible run.
- Bring a real shutter or painted board rather than a small paint chip. Hold it upright against the horizontal stone and inspect the combination under warm lighting and daylight.
- Check the finished edge and surface. Ask how the chosen profile will pass through mineral clusters, filled areas and visible corners.
- Request the absorption record for the slab lot, plus the proposed sealer and maintenance instructions.
- Describe your cooking candidly. Discuss oil-heavy preparation, direct sunlight, ventilation and whether anyone will carry out periodic maintenance.
Book the height trial and layout review before approving cutting. Bring the sink and hob specifications, a cabinet plan and photographs of access routes so the fabricator can assess piece sizes and installation constraints.
The slab galleries at Sikanderpur Marble Market and HUDA Marble Market Sector 33–34 in Gurugram provide an opportunity to make the comparison in person. Confirm sample arrangements and fabrication requirements before your visit.
The right slab isn't necessarily the whitest or most dramatic. It's the one that looks right under your own lights, works beside your actual cabinet door and suits the way you cook.
Varun Marbles supplies granite and engineered quartz, with cut-to-size fabrication, edge profiling, finishing and installation coordination. Visit Varun Marbles with your cabinet sample, kitchen plan and appliance specifications to compare slabs and discuss a countertop suited to your cooking and maintenance habits.